Tuesday, December 23, 2008

Install Java 6 on Ubuntu 8.10

There are several ways of installing Java on the Ubuntu operating system. One of the easiest ways is to make use of apt-get command in Ubuntu.

Setup Repository

The apt-get command makes use of a source configuration file, which contains a list of the repositories the package manager should query to retrieve the correct package. The source configuration file is known as sources.list and is situated in the /etc/apt/sources.list location. The following command can be used to edit the source file to ensure the multiverse repository is included.

Code:


sudo gedit /etc/apt/sources.list

Ensure that the following two sources are added to the configuration file:


deb http://za.archive.ubuntu.com/ubuntu/ intrepid main restricted

deb http://za.archive.ubuntu.com/ubuntu/ intrepid multiverse


After the configuration file is updated, the package repository needs to updated with the following command:

Code:


sudo apt-get update


Install Java Package

After the package repository was successfully updated, the Sun Java packages can be installed on the Ubuntu system. The Sun Java packages consist of Java 5 and Java 6 packages. Depending on the version that is required, the list of packages specified below can be installed.

Java 5
The Java 5 packages available is listed as follows:

  • sun-java5-bin
  • sun-java5-fonts
  • sun-java5-plugin
  • sun-java5-demo
  • sun-java5-jdk
  • sun-java5-source
  • sun-java5-doc
  • sun-java5-jre
  • sun-java5-src

Java 6
The Java 6 packages available is listed as follows:

  • sun-java6-bin
  • sun-java6-javadb
  • sun-java6-plugin
  • sun-java6-demo
  • sun-java6-jdk
  • sun-java6-source
  • sun-java6-doc
  • sun-java6-jre
  • sun-java6-src
  • sun-java6-fonts
  • sun-java6-jre-headless

To install Java version 6, the following command needs to be executed:

Code:


sudo apt-get install sun-java6-jre sun-java6-jdk sun-java6-plugin


Verify Java Installation

To verify that the correct version of java is installed the following command can be used:

Code:


java -version

This command will print the current version of java that is active. Should there be more than one version of Java be installed on the operating system, the following command can be used to list the available java versions:

Code:


update-java-alternatives -l

This command list all the available Java runtime environments on the Ubuntu system. To change from one version to another, the following command can be used:

Code:

sudo update-java-alternatices -s


Testing Java Runtime Environment

You’ll want to confirm that your system is configured properly for Sun’s JRE. This is a two-step process.

First, check that the JRE is properly installed by running the following command from a terminal.

java -version

You should get similar output

java version “1.6.0″
Java(TM) SE Runtime Environment (build 1.6.0-b105)
Java HotSpot(TM) Client VM (build 1.6.0-b105, mixed mode, sharing)
Testing Java Plugin for Firefox

open Firefox and typing about:plugins in the address bar and check for java plugin

Saturday, December 20, 2008

Install Flas Player For Ubuntu Linux

Type the following command to install flash player:

$ sudo apt-get install flashplugin-nonfree

Now flash player should be working. Visit youtube or any other site to view flash content.

Troubleshooting tip

Update: This issue only relevant to older Ubuntu Linux version such as 6.04.

Some people may find voice is not working with newly installed flash player. Type following commands to solve this problem (thanks to macewan.org):
$ sudo apt-get install alsa-oss
$ gksudo gedit /etc/firefox/firefoxrc

Find line that read as FIREFOX_DSP and set to:
FIREFOX_DSP="aoss"

Save and close the file.

Close Firefox and restart it again.

Install VMware Server 2.0 on Ubuntu 8.10

1. Download VMware Server 2.0

Registe on VMware web site to get an account. When you download you would see a serial nomber.

What I download was TARimage (not for 64 bit version). you should get what you need according your machine.

VMware-server-2.0.0-122956.i386.tar.gz

2. Install nessesary dependence:

sudo apt-get install linux-headers-`uname -r` build-essential xinetd
sudo apt-get install xinetd

3. Unzip tar ball

tar zxvf VMware-server-2.0.0-122956.i386.tar.gz

you will get a folder:

vmware-server-distrib

4.

cd vmware-server-distrib

sudo ./vmware-install.pl


之后

cd vmware-server-distrib
sudo ./vmware-install.pl

下面一路回车就可以了。只是要注意一点:

The current administrative user for VMware Server is ”. Would you like to
specify a different administrator? [no]

如果你选择默认的no,在登录vmware终端的时候要用root。这不是个大问题,但是如果你想用你自己的用户登录(登录Ubuntu的用户),你必须输入yes然后回车,然后就会让你i输入你自己的用户。

4.如果你上步选择了默认的no,就会以root登录,你要为root设个密码:

sudo passwd root

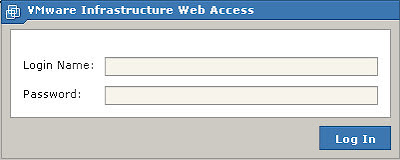
5. 打开Firefox(我试过Opera也可以),在地址栏输入 http://localhost:8222会弹出登录框。

6.输入你的用户名和密码,如果第三步选择no,在这里就要用root登录。

OK,现在可以建立你自己的虚拟机了。

Friday, December 19, 2008

AAA

Windows A8425-FPWAR-V9684-4KJAH

Linux A0081-FMW2D-UE1F0-4UQHH

Xcopy- Powerful and versatile way to copy or back up files

Copy- Powerful and versatile way to copy or back up files

For copying large numbers of files or backing up a large folder, the command line is often the fastest and easiest way to go. The command “xcopy” is a very useful and powerful command for this purpose. (The old DOS also had an “xcopy” command but it sometimes had trouble with long file names. The XP version has no such problems.) “xcopy” comes with an alphabet soup of assorted switches that give it great versatility for use as a file backup utility. Enter “xcopy /?” in a command prompt to see them all. For example with the switch “/d:[mm-dd-yyy]” only files changed after a given date are copied. A command that will copy all files from the folder myfolder that have changed since June 1, 2003 to the folder mybackup is given byxcopy myfolder mybackup /d:06-01-2003 If no date is specified the switch “/d” will copy all files that have changed at any time.As is true in general, if there are spaces in a name, the path and file name have to be enclosed in quotes. Adding the switch "/s" provides that subfolders and their contents will also be copied. Other switches provide for read-only and hidden files. Altogether, there are something like 27 command line options for xcopy. More information is on this page.

如何在Ubuntu上安装RealPlayer(How to install RealPlayer on Ubuntu)

ZT

本来在Ubuntu上安装RealPlayer应该是很容易的,就是直接在终端中键入
sudo apt-get install realplayer
就可以了的,但是我如此操作只能得到

正在读取软件包列表... 完成
正在分析软件包的依赖关系树
Reading state information... 完成
现在没有可用的软件包 realplayer,但是它被其它的软件包引用了。
这可能意味着这个缺失的软件包可能已被废弃,
或者只能在其他发布源中找到
E: 软件包 realplayer 还没有可供安装的候选者
我已经用了官方的源和LupaWorld的源都是如此。于是准备自己手动安装RealPlayer。
先到RealPlayer官方网站上下载:
http://www.real.com/linux/?src=020923home_cn_cn
将文件RealPlayer10GOLD.bin保存到主文件夹中,即/home/[yourusername]文件夹下。
然后打开终端,进行如下操作:
$chmod +x RealPlayer10GOLD.bin
$sudo ./RealPlayer10GOLD.bin
当终端显示
Welcome to the RealPlayer (10.0.8.805) Setup for UNIX
Setup will help you get RealPlayer running on your computer.
Press [Enter] to continue...
时按下回车键,进入下一步:
Enter the complete path to the directory where you want
RealPlayer to be installed. You must specify the full
pathname of the directory and have write privileges to
the chosen directory.
Directory: [/home/shixinyu/RealPlayer]:
这里默认安装到用户的主文件夹下的RealPlayer目录下,如果你想要安装到别处,就在此处输入路径,否则直接回车即可。
You have selected the following RealPlayer configuration:

Destination: /home/shixinyu/RealPlayer

Enter [F]inish to begin copying files, or [P]revious to go
back to the previous prompts: [F]: F
安装程序会提示最后确定信息,如果都确定了,按下F键后回车。
当提示
Copying RealPlayer files...configure system-wide symbolic links? [Y/n]:
时按下Y键回车即可,后面基本上就没有需要用户操作的地方了,通常到这里基本上就安装好了,你可以到“应用程序,影音”下找到RealPlayer10来运行了,首次运行会有一段安装协议需要同意。

注:如果在跟着上述步骤完成安装操作之后到应用程序菜单下的“影音”中单击RealPlayer无反应,并且你的Ubuntu安装的是SCIM输入法,那么很可能是SCIM与RealPlayer的冲突,你还需要进行下面操作:
$sudo gedit /home/[yourid]/RealPlayer/realplay \\[yourid]指你的主文件夹名
在打开的文本编辑器的首行添加下面一行
export GTK_IM_MODULE=xim

之后保存文本编辑器,然后再次执行RealPlayer应该就正常了。


*** ???
添加源
deb http://archive.canonical.com/ubuntu dapper-commercial main
即可直接升级。

Thursday, December 18, 2008

Install Mplayer on Centos 5

1.
yum install yum-fastestmirror

2.
yum install yum-priorities

3.

Download (corresponding to your computer)
i386 http://apt.sw.be/redhat/el5/en/i386/rpmforge/RPMS/rpmforge-release-0.3.6-1.el5.rf.i386.rpm
x86_64 http://apt.sw.be/redhat/el5/en/x%20...%201.el5.rf.x86_64.rpm

4.
Install DAG's GPG key

rpm --import http://dag.wieers.com/rpm/packages/RPM-GPG-KEY.dag.txt

5.

Check

rpm -K rpmforge-release-0.3.6-1.el5.rf.*.rpm (you don't have to do this step)

Install:

rpm -ivh rpmforge-release-0.3.6-1.el5.rf.*.rpm

6.
Check for update:

yum check-update

This step might take a longer time, system will create a file named "primary.xml.gz"

7.
yum install mplayer*

8.
[root@centos installed]# yum check-update

9.

application ---> Sound and Video --->mplayer

Complete!!